AdminCommander#
GUI for managing server connection and user settings. Projects, experiments and datatypes can be created here, and copy atlas files to local folders for quick access. eLabFTW API key can be entered here.
From the datastructure_tools directory run
python ./AdminCommander.py
or from any directory
python -m datastructure_tools admin
Error
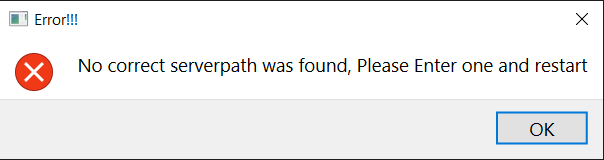
In case you get this error when starting the AdminCommander, this means the dataserver is not under default path. Please configure the path to the server via 5.
DB configuration#
Here we enter the information for connection to DB. This needs to be done once after installation. If you install datastructure_tools in a different folder or different computer you will need to enter this again.
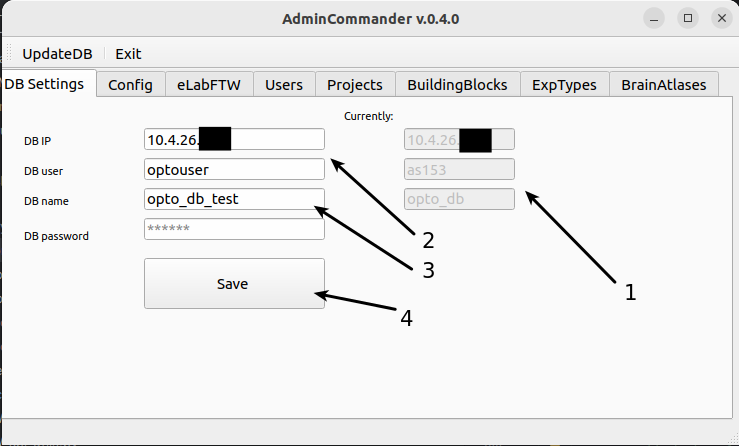
This indicates whether any connection is established to the DB. If it says “Not connected” you need to enter the credentials in following steps, if there are values shown, you are connected.
Enter here the ip adress and user_id (e.g. optouser) and password. If you dont know those, please ask some knowledgeable person in the lab.
Choose a database to use. We have opto_db as our main DB and opto_db_test as test instance. Please use opto_db_test if you are just playing around. And opto_db if you know what you are doing.
Press Save (or change connection if you are already connected). If you entered correct credentials you will get a message and now datastructure_tools now has a connection to DB. Please restart AdminCommander.
Note
Manual changes This information can also be manually edited in datastructure_tools/DataJoint/server_config.json
User-specific config#
Note
User settings are not required, they require a connection to our fileserver. If you do not have access to the fileserver, you can skip this step.
Here you can enter settings that improve the user experience. Some settings you save here will be used in other GUIs, saving you time. For example, the user will automatically be set to you.
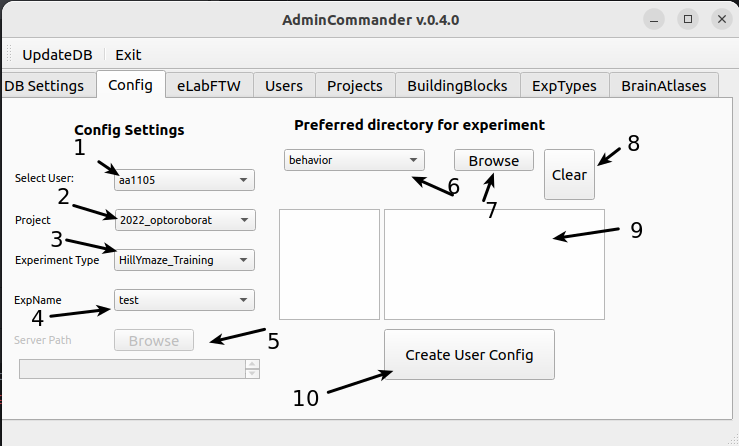
Select your user ID. Not present? Add yourself
Select your project. Not present? Add project
Select your typical experiment. Not available ? Add ExpType
Select a default Exp folder. This dropdown shows the top level folders in the project folder. Not sure what this means?
If the diester data server is not under the default path on your computer (these are /mnt/diester/archive/projects or O:/archive/projects) this field will be enabled. You can browse to the archive/projects folder and it will be saved as the as the parent part of the path structure. Not sure what this means?
If you plan to use FileCommander or SessionCommander, you can save the paths where your experimental data is typically stored for different modalities. data for different modalities are stored locally. For example, behav_video may be stored somewhere other than the daq data. This will This will allow you to quickly select the appropriate files, as the file browser will point you directly to the saved folders. In 6. you can select which modality of the selected ExpType you want to save.
Here you can specify the source folder.
Clear will remove the entered information about paths
Will show the overview of paths for each modality after input.
Press to save user configurations.
Note
Manual changes This information can also be manually edited at datastructure_tools/user_config.json
Enter API-key for eLabFTW#
To automatically push items from the DB to eLabFTW, you need an API key, which is used to log in to the API. through the API. Get your API key
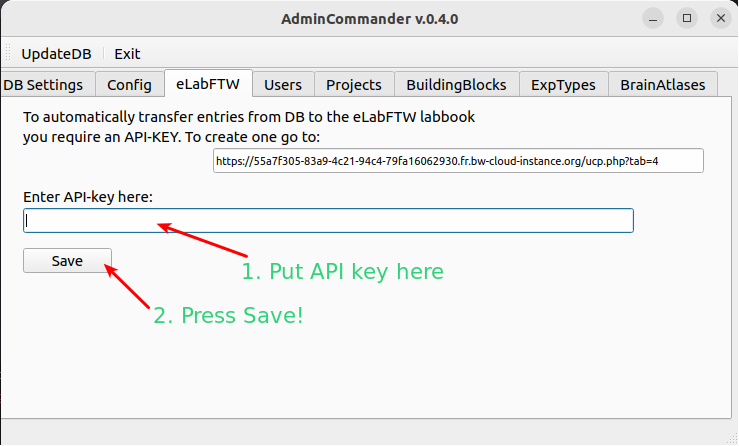
Enter the key in the Admincommander
Save
After saving the key, the program will try to connect and verify the key. If everything works as expected the key will be saved in user_config.json.
Adding Users#
Here you can register new database users. IMPORTANT! these are not users the same that connect to the DB While those usernames can be chosen freely we advise to use the RZ-IDs here.
Note
Important Please also send the new user_id to one of the administrators of the eLabFTW, so the internal_id can be set correctly.
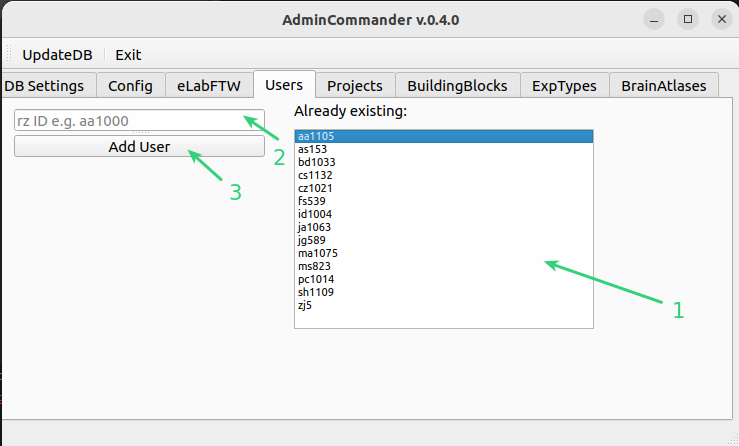
List of users already added to DB
Entry field for new users. Please use your RZ-id e.g. aa1000
Press add
Adding Projects#
Here you can add new projects to the database. IMPORTANT! only those projects can be registered that are in the top tree of the archive/project. If you need a new one and do not have a folder yet. Ask the administration to create one. Refer to general datastructure
Conventions to name your project folder:#
As people started creating new project folders, we realized that we needed a clearer naming convention for them, and the sooner we implemented it the better (it will be a lot more work later than it is now). The idea of the organization was to distinguish between a project as an overarching name and different experiments within the project. To keep the folder organized, it would be great to name the project like this <year>_<descriptive name or grant>. Within these project folders you can keep different experiments. For example, a project could be 2014_ERC and an experiment within it could be Betaburst_reinforcement. Not ideal names would be 2024_Behavior, since many people do behavior and neither the goal nor the grant is obvious. Also problematic is something like 2023_ALM, as many people can work on that structure, and it is not directly understandable what the goal of that project is. Also, it would be ideal to keep the project folder sparse, i.e. only create multiple project folders if they are really distinct in the sense that they contain completely different experiments/have different goals.
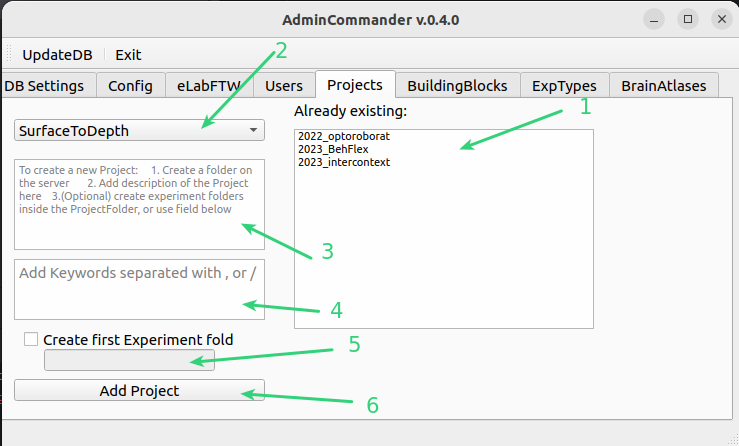
List of projects already added to DB
Dropdown with folder at top-level of archive/project
Enter a short description of the project.
add keywords separated by , or /
If you would like to create an Experiments folder you can check it and enter a name, this will create this folder under the project folder. Ensure you have writing right in this folder!
Press to Add
Building Blocks of datastructure#
Read datastructure first. Here we define file-structure for modalities of data-building blocks. Existing buildingblock should be reused if they fit to you data modality.
Building Blocks are templates of default prestructure of experimental procedures. These procedures can be:
miniscope recordings
2P in vivo
2P in vitro calcium imaging
electrophysiology in vivo
behavioral recordings
patch clamp recordings
etc
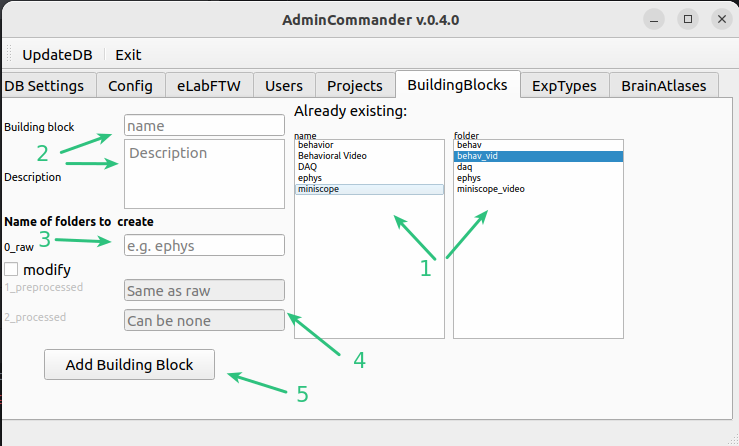
Existing blocks and corresponding folder names
enter a new block with a short description
enter the name of the raw folder for this data modality
by default, preprocessed and processed folders have the same names, if you want to change them or do not have a processed folder processed folder, because this modality will be combined with others during preprocessing and therefore does not need its own folder. folder, please check Change and enter names (processed can be empty, then no processed folder will be created).
Press Add
Experimental types#
Aka combination of blocks. Here we combine different block for different types of experiments. E.g you may do experiments with only ephys or with ephys+behavior.
Example experimental profiles per user/type of experiment:
BriceExperiment1 [miniscope, behavior]
BriceExperiment2 [miniscope]
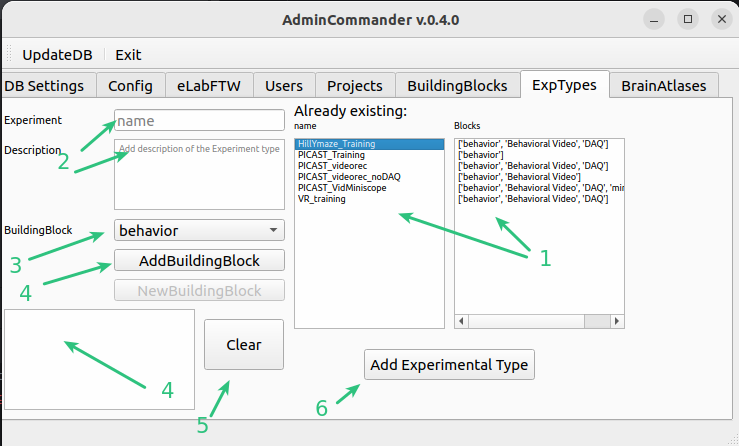
Existing Experimental types and corresponding building blocks
enter a new experimental type with short desc
choose a building block to add. Add new
list of temporarily added blocks
Press clear to remove all and restart entering
If you are happy with you blocks Press Add
Copy brain atlases#
Here you can copy the brain atlas files to your local folder inside the datastructure_tools. This will allow to use them in SurgeryPlanner and SurgeryCommander. You dont need to copy them if you are not planning to use these tools in detail.
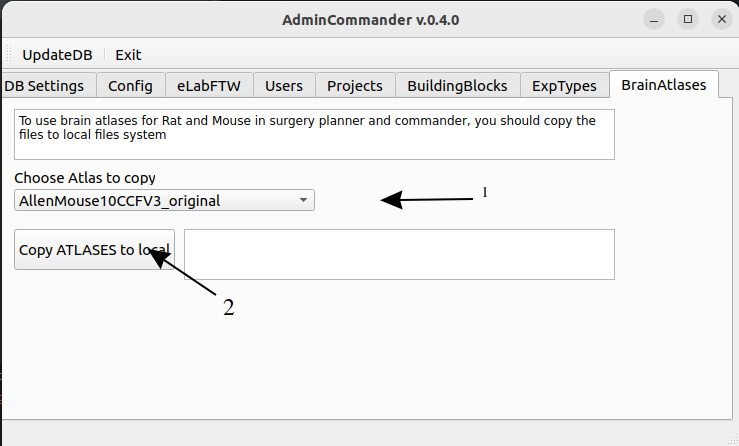
Choose an atlas to copy
Press button
written by: Artur
last modified: 2024-10-22